IN BRIEF
|
In the world of mechanics, knowing how to master disc brake replacement is an essential skill to ensure safe and effective driving. The brakes, a key element of your vehicle’s safety, must be regularly maintained. Whether you are a mechanical enthusiast or simply a driver, learning the appropriate techniques for replacing brake discs will not only allow you to save money but also enhance your knowledge in the area. From preparation to execution, it is crucial to follow precise steps and avoid common mistakes to ensure an optimal result.
Changing disc brakes can seem intimidating, but with the right techniques and a bit of practice, this task can be safely accomplished at home. In this article, we will explore the advantages and disadvantages of mastering disc brake replacement, to help mechanical enthusiasts make an informed decision.
Advantages
Mastering disc brake replacement has several advantages. First of all, it saves you money on labor costs, as you will be able to do the work yourself. Furthermore, by learning to replace your brakes, you gain independence and safety, as you will be able to regularly check the condition of your braking system.
Moreover, you will have a better understanding of your vehicle, which can boost your confidence as a mechanic. By familiarizing yourself with the process, you can also anticipate potential problems and resolve them before they become critical. With the right tools and some knowledge, changing brakes becomes an accessible task.
Disadvantages
However, changing your own disc brakes also has disadvantages. First, it requires a certain investment in tools, which can represent a significant initial cost. Additionally, it is crucial to devote the necessary time to perform this task correctly, or you risk compromising the safety of your vehicle.
Furthermore, mistakes during the installation of disc brakes can lead to serious consequences, such as brake system failure. Therefore, it is important to be well informed, to follow trustworthy guides, and to observe safety standards. It is also advisable to consider professional help if you are unsure of yourself.
Changing the disc brakes of your vehicle may seem daunting, but with a bit of preparation and the right techniques, you can accomplish this task yourself. This guide explains step by step how to proceed, covering the necessary tools, safety, and the steps to follow for a successful replacement.
The Essential Tools
Before starting the replacement of your brake discs, it is crucial to gather all the necessary tools. You will need a wrench, a jack, jack stands to support the vehicle, as well as a breaker bar to loosen the wheel nuts. Also, remember to wear safety equipment such as gloves and safety glasses.
Preparing the Vehicle
Before lifting the vehicle, it is important to slightly loosen the wheel nuts without removing them completely. Once this is done, use a jack to safely lift the vehicle. Then place jack stands to ensure optimal stability during the change.
Removing the Old Discs
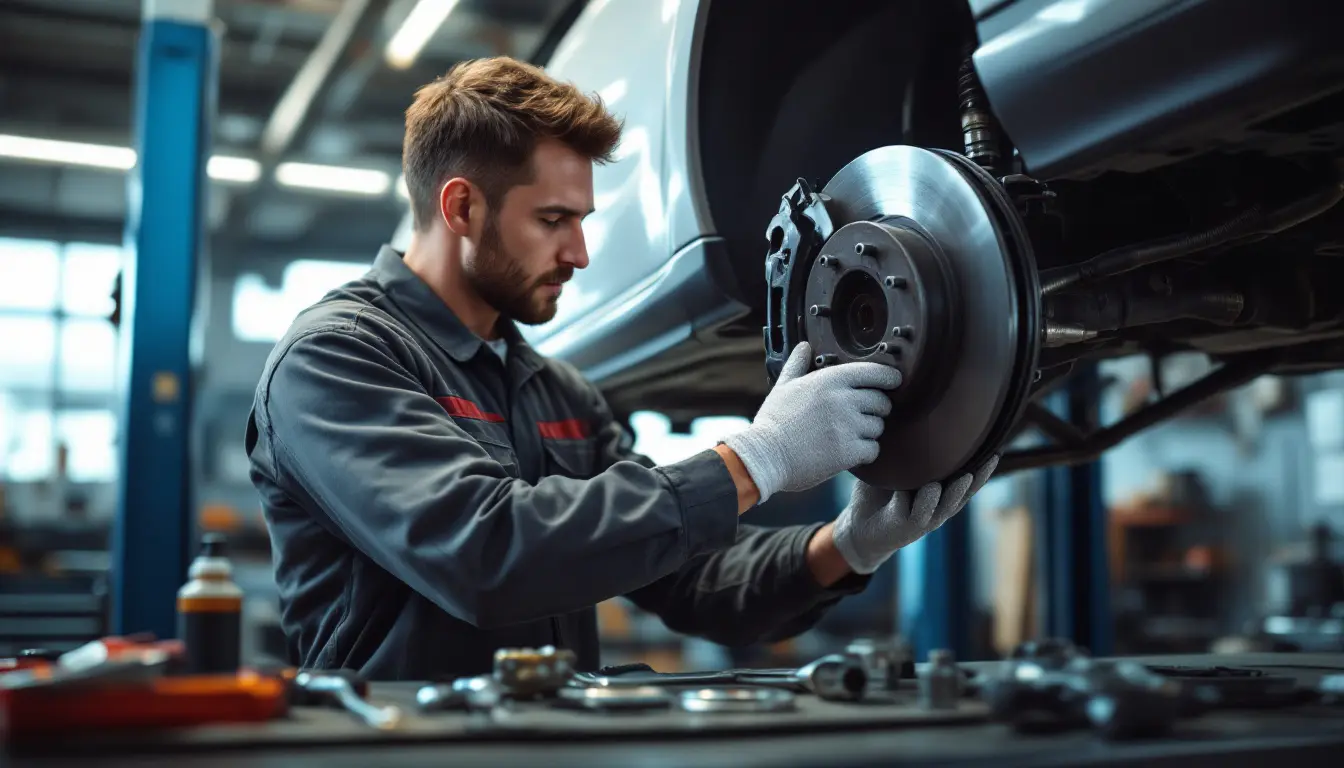
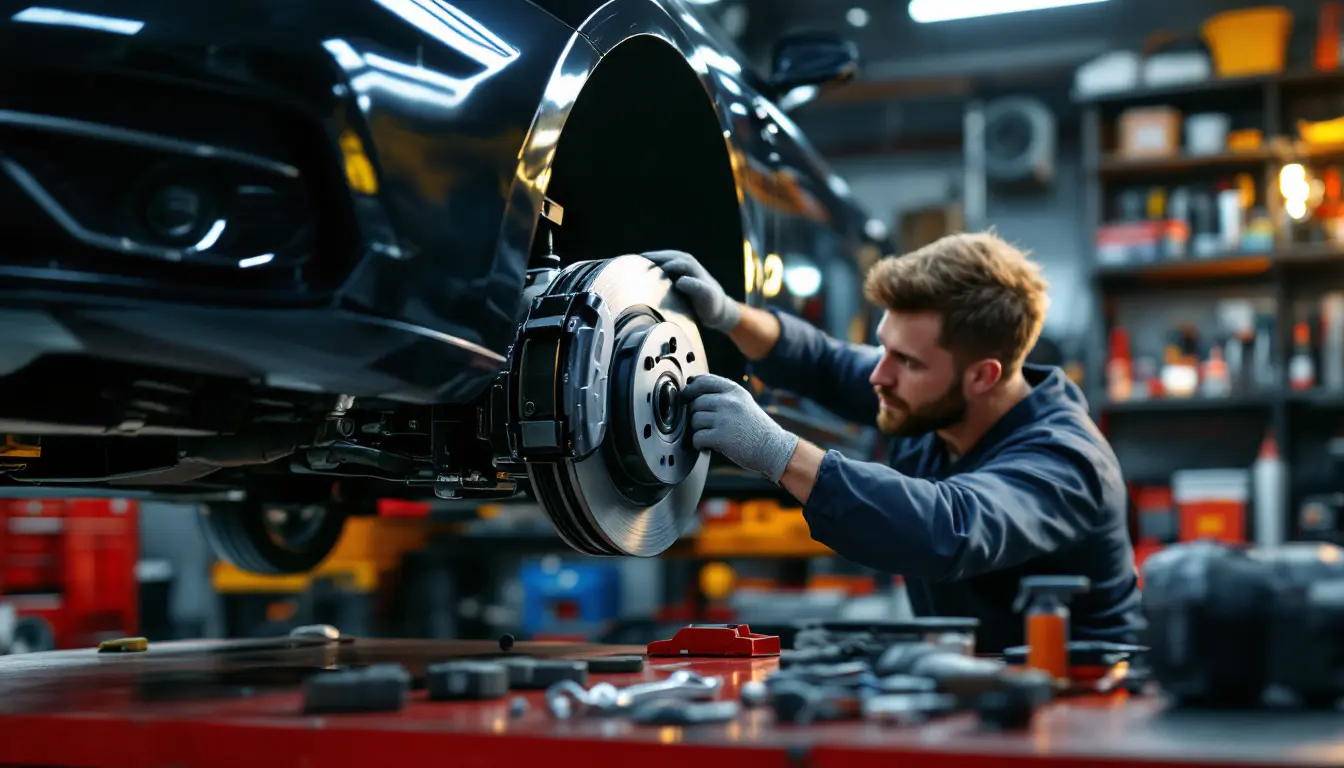
Once the vehicle is securely on jack stands, you can remove the wheels. Then, access the brake discs by removing the brake pads. This step requires precision to avoid damaging surrounding components. Examine your discs to check if they are in good condition or need to be replaced.
Installing the New Discs
Once the old discs are removed, you can proceed to install the new discs. Make sure the discs are properly aligned with the brake caliper. Then, tighten the nuts evenly to ensure balanced pressure on the disc.
Reassembly and Final Tests
After installing the new discs, put the brake pads back in place and reattach the wheels. Lower the vehicle and tighten the nuts fully. To ensure everything works perfectly, take a test drive and check the proper functioning of your braking system before hitting the road again.
Errors to Avoid
When replacing brake discs, certain errors can have serious consequences. Avoid neglecting the step of checking the wear of the brake pads when changing the discs. Moreover, not testing the brakes after completing the installation can compromise your safety on the road.
For an explanatory video on the subject, you can check this link: Easily Change Brake Discs at Home. For more information about the legal implications of maintaining your motorcycle, visit this site.
Changing the disc brakes of your vehicle may seem complex, but with the right techniques and a little practice, this task can become routine for any mechanical enthusiast. In this article, we will explore the essential steps and the tips to follow to perform this work safely and effectively.
Prepare Your Workspace
Before you begin, it is crucial to prepare an appropriate workspace. Make sure to have all the necessary equipment at hand, including tools, protective gloves, and safety glasses. A well-organized environment greatly facilitates repairs and minimizes the risk of accidents.
Choose the Right Tools
To change the brake discs, you will need a few essential tools. You will require a wrench, a jack, and jack stands to safely lift the vehicle, as well as a breaker bar to loosen the nuts. Ensuring that you have everything at hand before starting will prevent interruptions.
Assess the Condition of Your Brakes
It is essential to know when to replace your brake discs. Signs such as unusual noises or less effective braking may indicate wear. Don’t forget to visually inspect your brake discs before any intervention. For more information, consult specialized online guides.
Proceed with the Replacement
To carry out the replacement, start by removing the relevant wheel. Then, unscrew the brake pads and the worn discs. Be careful not to damage the other components. Once the installation of the new discs is done, don’t forget to securely tighten each nut and check everything before lowering the vehicle.
Common Mistakes to Avoid
Changing brake discs may seem simple, but mistakes can occur. Ensure that you carefully follow each step and do not rush through adjustments. Poor assembly can compromise the safety of your vehicle. Take the time to conduct a thorough check once the replacement is finished.
For Additional Information
To deepen your knowledge of changing disc brakes, you can consult this detailed guide. If you are interested in style and safety while riding a motorcycle, also visit this link or explore the considerations on speed limits when driving.
Investing time in learning these mechanical tasks will allow you to gain better mastery over your vehicle while providing you with a sense of accomplishment.
For enthusiasts and professionals, having the appropriate accessories for maintenance is essential. This will facilitate each intervention. More information on this topic can be found here: best accessories.
Comparison of Methods for Changing Brake Discs
| Methods | Considerations |
| Using a Visual Guide | Facilitates understanding of the steps, reduces the risk of errors. |
| Specific Equipment | Using suitable tools is crucial for flawless execution. |
| Checking the Condition of Components | Examine the wear on the discs and pads to avoid future problems. |
| Safety Knowledge | Compliance with safety regulations to ensure your protection. |
| Considering Weather Conditions | Adapt the method based on environmental conditions to prevent accidents. |
| Post-Replacement Maintenance | Regularly check the brakes after replacement to ensure proper functioning. |
| Tracking Past Repairs | Knowing the history can provide insights into potential problems. |
Testimonials on Mastering Disc Brake Replacement
Changing brake discs may seem intimidating for novices, but with a little practice and the right instructions, it becomes a perfectly achievable task. I recently replaced my brake discs myself after watching a few tutorials online. The steps were clear, and most importantly, I took the time to identify the necessary tools before starting. Keeping a workspace organized really helped make the process smoother.
During my first experience, what surprised me the most was the importance of using protective gloves and safety glasses. It may seem trivial, but I realized that safety must always come first. Once I got started, I discovered that the wheel nuts should not be completely removed before lifting the vehicle. This tip helped me avoid excessive force and the risk of injury.
Another crucial point I learned is to always replace the brake pads at the same time as the discs. This ensures optimal performance. When reassembling the new parts, taking the time to properly align them is essential to avoid future problems. I also noticed that it is important not to underestimate the influence of driving habits on brake wear. Abrupt and frequent braking can significantly reduce the lifespan of my discs.
Avoiding small mistakes is just as important. For example, I almost overlooked checking the condition of the brake lines and ensuring they were properly secured. A simple check made all the difference in my confidence when driving after the change. Today, I feel capable of performing this essential maintenance on my own, which also saved me on garage fees. I encourage anyone who owns a motorcycle to try learning this valuable skill!
Changing the brake discs of your vehicle may seem intimidating, but with a bit of preparation and some advice, you can master this essential skill. In this article, we will address the key steps, the necessary tools, and common mistakes to avoid when replacing your brake discs. Whether you are a novice DIY enthusiast or an experienced professional, these recommendations will allow you to perform this task safely and effectively.
Preparation and Necessary Equipment
Before getting started, make sure you have all the necessary tools at hand. Here is a list of essential equipment:
- Safety glasses to protect your eyes from debris.
- Protective gloves to keep your hands safe.
- Jacks and jack stands to lift and hold the vehicle safely.
- wrench to unscrew the bolts.
- Wheel chocks to immobilize the vehicle.
Also, ensure you have a clean and clear workspace to facilitate your movements and minimize the risk of accidents.
Identifying Signs of Wear
Before proceeding with the replacement, it is crucial to determine if your brake discs are indeed worn. Visible signs such as scratches, cracks or uneven thickness may indicate that they need to be replaced. When you press the brake pedal, if you feel vibrations, this may also be a sign of wear on the discs. Regularly checking your brakes will help prevent any incidents.
Steps for Replacing Brake Discs
1. Lift the Vehicle
Use a jack to lift the vehicle to a sufficient height to work comfortably. Then secure it with jack stands to avoid any risk of falling.
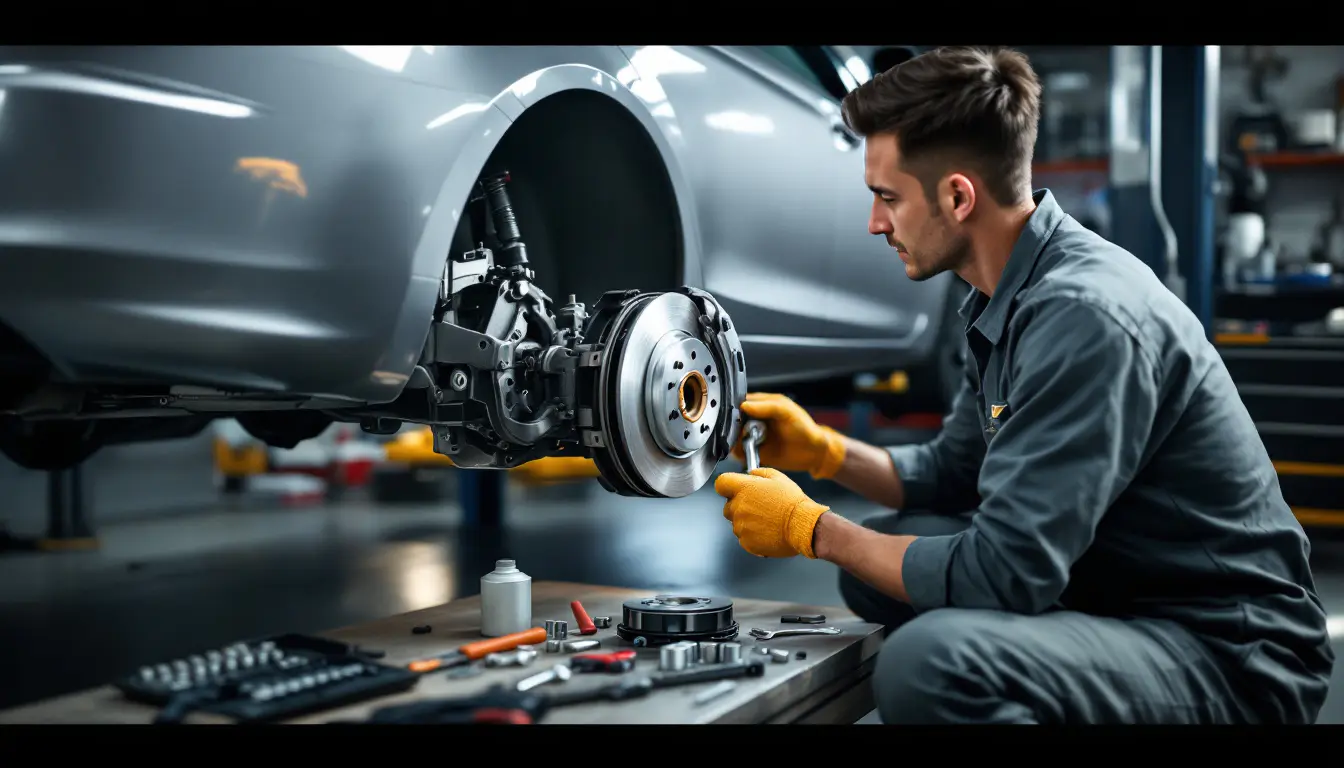
2. Remove the Wheels
Unscrew and remove the wheels to access the components of the braking system. Be sure to keep the bolts in a safe place.
3. Disassemble the Braking System
After removing the wheels, you will need to unscrew the brake pads to access the discs. Take notes or photos of the arrangement of the parts for easier reassembly.
4. Replace the Discs
Once you have removed the pads, unscrew the bolts securing the disc to the axle. Replace the old disc with the new one, ensuring it is correctly aligned. Also, check the condition of the pads and replace them if necessary.
5. Reassembly
After installing the new discs, put the brake pads back in place, then reinstall the wheels. Tighten the bolts securely to ensure safety.
Errors to Avoid
Some common mistakes can harm the performance of your braking system. Make sure not to forget to:
- Use the right parts for your vehicle model.
- Not tighten or loosen the bolts too much.
- Forget to bleed the brake system if necessary.
Following these recommendations will help you master the change of your brake discs, thus ensuring your safety and that of your vehicle on the road.
The replacement of disc brakes is an essential operation to ensure the safety of your vehicle. Whether you are a passionate DIYer or a seasoned driver, it is crucial to know the steps to take for an effective replacement. Before diving into this process, be sure to equip yourself with the right tools and to follow safety standards, such as wearing gloves and safety glasses.
Start by assessing the condition of your brake discs. Signs of wear such as grooves, rust, or uneven thickness may indicate that they need to be replaced. Once you have checked their condition, prepare a clean and clear workspace to facilitate access to your vehicle’s components.
It is recommended to replace both the discs and the brake pads to ensure maximum performance. When proceeding with the disassembly, carefully follow the steps, including loosening the wheel nuts before lifting the vehicle with a jack. Do not rush through the steps and be meticulous to avoid errors that could compromise the safety of your brakes.
Once the replacement is completed, test the braking system by performing a few maneuvers to ensure that everything operates correctly. It is also important to consider a few tips to maintain your brakes in optimal condition, such as avoiding harsh braking and paying attention to tire pressure. Thus, you maximize the lifespan of your braking system while driving safely.
FAQ on Disc Brake Replacement
Q: Why is it important to change brake discs? Changing brake discs is crucial to ensure optimal safety while driving. Worn discs can affect braking and compromise vehicle performance.
Q: When should I consider replacing my brake discs? It is recommended to replace brake discs based on mileage, operating conditions, and driving habits.
Q: What tools are needed to change brake discs? To carry out this operation, you will need protective gloves, a jack, jack stands, a breaker bar, and specific mounting tools.
Q: What are the main steps to replace brake discs? The steps include: lifting the vehicle, removing the wheels, unfastening the discs, removing the old discs, and installing the new ones.
Q: Should I replace the brake pads at the same time as the discs? It is highly advisable to replace the brake pads at the same time as the discs to ensure even braking.
Q: How can I tell if my brake discs are worn? You can check the wear on the discs by looking for irregularities, scarring, or measuring the thickness with a caliper.
Q: What mistakes should I avoid when changing brake discs? Avoid neglecting the use of safety equipment, over-tightening or under-tightening the bolts, or leaving dirt on the contact surfaces.
Q: Can I change my brake discs myself? Yes, with a little technique and ingenuity, it is possible to perform this task yourself, provided that you follow the correct methods.

